
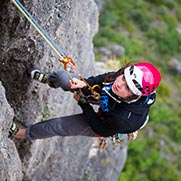


Rappelling
Rope techniques for a rappel descent require vigilance and organization. All maneuvers at the anchor must be done while directly connected to the anchor.
Warnings
- Carefully read the Instructions for Use used in this technical advice before consulting the advice itself. You must have already read and understood the information in the Instructions for Use to be able to understand this supplementary information.
- Mastering these techniques requires specific training. Work with a professional to confirm your ability to perform these techniques safely and independently before attempting them unsupervised.
- We provide examples of techniques related to your activity. There may be others that we do not describe here.
1. Installing the rope at the anchor
Note: Tying a knot at the end of the rope is a necessary precaution in a variety of situations (long rappel, poor visibility, fatigue).
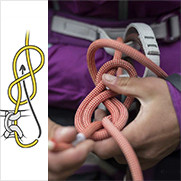
2. Installing a friction hitch
A friction hitch holds the user if they need to go hands free during the rappel (e.g. rockfall, knots in rope).
- To make it easier to install the descender, install the friction first and pull rope through to create slack.
- Attach the friction hitch to the belay loop of the harness with a girth hitch to keep from dropping it.
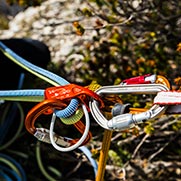
3. Installing the descender
- Attach the fixed arm of the DUAL CONNECT ADJUST to the descender.
- Install the strands of rope in the descender and remember to lock the carabiner.
- Take up slack between the descender and the anchor, and between the descender and the friction hitch.
- Remove the adjustable arm from the anchor, and you’re ready to rappel.
Tip: While descending, the adjustable arm of your lanyard is not used. Clip it to the retrieval strand to serve as a reference once you arrive at the next anchor.
4. Reaching the next anchor
To more easily reach the anchor, set the adjustable arm of your lanyard to its maximum length.
Once you have clipped the anchor and are on your feet, adjust the length of your lanyard.
5. Setting up for the next rappel
- Remove the rope from the descender and friction hitch.
- Attach the two ropes to the anchor so you don’t lose them and to back up the second climber’s descent.
- Remove the knots at the ends of the rope if necessary.
- Take the rope end that you’re going to pull and pass it through the rappel ring.
6. Recovering the rope
Once the second climber is directly connected to the anchor, pull the rope.
To move from one rappel to the next, (with two rope ends of the same diameter), pass the rope through the rappel ring as it is being pulled from the previous rappel: the second pulls the appropriate rope end, while the leader ensures that it runs smoothly through the ring.
Once the knot reaches the anchor, the lead climber may begin installing their friction hitch and descender.
Verify that there are stopper knots at the end of each rope.
Once both rope strands have been recovered, the leader is ready to descend.
Variation depending on the descent techniques used
The most common case is rappelling on two identical rope strands, as described above (for example, two half ropes used for climbing).
But there are many other possible rappelling scenarios that require specific precautions.
- Rappelling on two ropes of different diameter or different types of rope (for example, a dynamic rope and a RAD LINE cord)
The difference in friction and elasticity between these two ropes can cause the joining knots to shift at the rappel ring. Warning: be aware if the rappel ring is big enough to allow the knots to pass through.
- Rappelling on a single strand (for example, if you belayed your climber with a GRIGRI or if your tag line is particularly thin and slippery)
Reference the Tech Tip: Multi-Pitch Rappelling with a Single Rope.