Best practices for belaying a lead climber
Whether at the climbing gym or crag, the base of any route often includes good-humored banter while cheering on your friends. Higher up on the wall, climbers focus on their routes, having fun while concentrating on the next move, placing full trust in their belayer. In spite of the relaxed atmosphere, you should always remember that belayer attentiveness is vital for climber safety whatever the belay device: no device can replace a good belayer. The following is a short review of the main techniques for being a good belayer, and subsequently a good climber.
November 16 2017
Indoor and Outdoor Climbing
Choosing the right gear for the climbing gym
The gym does not require much gear to climb or belay, and the less gear you need to manage the more comfortable you will be. A lightweight harness, climbing shoes, a belay device, and a single rope are enough. In general, you do not need a lanyard since the anchors at the top of each route are properly configured.
For a rope, make sure that you have the minimum length required; a rope that is too long may be a hassle to manage.
You should also make sure that your rope's diameter is compatible with the belay device being used. Now all that remains is to add a touch of style by color coordinating (or not) your climbing shoes with your harness, t-shirt, and why not your helmet, too!
For climbing at the crag, choosing the right gear is a bit more complex, and depends on route length and the fixed protection in place.
Contents of an indoor climbing bag
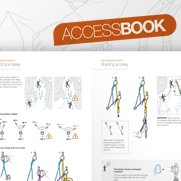
Good belayers focus all of their attention on the climber. The essential belay techniques in the following visuals are valid with all belay devices.
1. Conduct a partner check before each climb
After choosing a route, the climber makes sure that the rope is the right length. The climber should also make sure that there is not too great a weight difference with the belayer. Before stepping off the ground, both climber and belayer check each other's equipment, also known as the partner check.
2. Spotting before the first point of protection
Spotting limits the potential consequences of a fall during the first few meters of a climb, before the climber clips the first point of protection. Spotting does not serve to catch the climber, but to help avoid the consequences of a bad fall: guide the climber so they land properly in the best possible place and position, and to avoid falling backwards.
3. Universal technique for correct use of a belay device
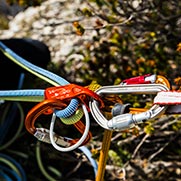
This hand position is valid whatever the device used: a tube, GRIGRI, REVERSO…
Your hand should never let go of the brake side of the rope.
4. Vigilance, anticipation, and mobility
The belayer's role is not limited to paying out slack quickly and at the right time. By staying focused on the climber, the belayer will recognize those tense moments that require being precise and responsive.
5. Stopping a fall
In the event of a fall, hold the brake side of the rope firmly while also pulling downwards. With all belay devices, gripping the brake side of the rope with your hand will increase rope friction within the device and allow you to stop the fall.
6. Communication after a fall and before lowering
Proper communication keeps each partner from being surprised by the actions of the other, and serves to avoid any errors. There is no need for long phrases; best agree in advance on simple terms such as "ok," "go," "take," "climbing"...
7. Lowering
When the climber is ready to lower, following the agreed upon commands, he/she weights the rope and does not control the descent. The belayer, who holds the climber's life in their hands, is entirely responsible for lowering.
View all of our tech tips on rock climbing
On each activity page, the tech tips are arranged by chapter: general, safety information, belaying…
Included in this article
Related News

