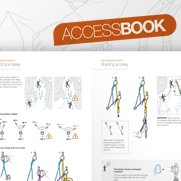

Good practices for belaying a lead climber
A good belayer should be dedicated to the climber's safety. Here is a reminder of essential practices, valid with any equipment.
Warnings
- Carefully read the Instructions for Use used in this technical advice before consulting the advice itself. You must have already read and understood the information in the Instructions for Use to be able to understand this supplementary information.
- Mastering these techniques requires specific training. Work with a professional to confirm your ability to perform these techniques safely and independently before attempting them unsupervised.
- We provide examples of techniques related to your activity. There may be others that we do not describe here.
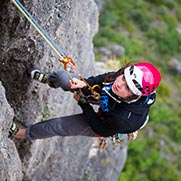
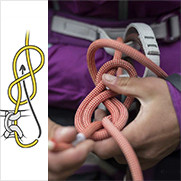
1. Do a partner check before each climb.
After choosing a route, the climber verifies that the rope length is suitable. He/she also verifies that the climber/belayer weight difference is not excessive. Before climbing, belayer and climber check each other's equipment setup: the partner check.
For more info: see the Partner Check technical tip.
2. Spotting a climber before the first protection point.
Spotting can help reduce the consequences of a fall in the first few meters of a climb, before the climber has clipped the first protection point. Spotting is not about catching the climber, but helping avoid the consequences of a bad fall: it's about guiding the fall so that the climber lands correctly in a good location and does not flip over backwards.
For more info: see the technical tip on Spotting and belaying at the start of a route.
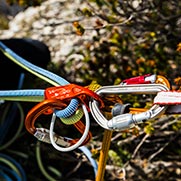
3. Universal technique for correct use of a belay device
For more info: see the technical tip on Universal technique for correct use of a belay device.
This hand position is valid regardless of the device used: tube, GRIGRI, REVERSO...
Your hand must never let go of the brake-side rope.
4. Vigilance, anticipation and mobility
The belayer's role is not limited to giving slack quickly and at the right time. By staying focused on the climber, the belayer can recognize the stressful moments that require the greatest precision and responsiveness.
For more info: see the technical tip on Belaying a lead climber - vigilance, anticipation mobility.
5. Stopping a fall
In case of a fall, hold the brake-side rope firmly, while pulling it downward. Whatever the device used, the act of gripping the brake-side rope with your hand increases the rope friction in the device, allowing the fall to be stopped.
For more info: see the technical tip on Belaying a climber - stopping a fall.
6. Communicating after a fall and before lowering
Communication should allow the two partners to avoid being surprised by the movements of the other, to avoid any error. It's not effective to have long discussions, it's better to use terms agreed upon in advance, such as "ok", "go", "take", "climb"...
For more info: see the technical tip on Belaying a climber - communicating.
7. Lowering
When the climber is ready to be lowered, after the agreed-upon signal, s/he is lowered on the rope and has no way of controlling the descent. All responsibility for this operation is on the belayer, who holds the climber's life in his hands.
For more info: see the technical tip on Belaying a climber - lowering.