Installing a life-line
Warnings
- Carefully read the Instructions for Use used in this technical advice before consulting the advice itself. You must have already read and understood the information in the Instructions for Use to be able to understand this supplementary information.
- Mastering these techniques requires specific training. Work with a professional to confirm your ability to perform these techniques safely and independently before attempting them unsupervised.
- We provide examples of techniques related to your activity. There may be others that we do not describe here.
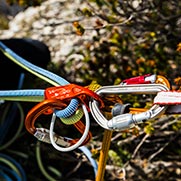
Installing a life-line is a dangerous operation, especially due to the great risk of a pendulum fall.
For this type of installation, the ASAP offers certain advantages, but requires specific precautions:
Advantages:
- Hands are free to manage the progression
- The user can quickly create enough slack to make knots, thanks to the sliding of the rope in the ASAP, while optimizing the rope tension during movement phases
Disadvantages:
In case of a pendulum fall on the ASAP, clearance is difficult to assess. It is greater than that from a simple pendulum on a rope
The clearance consists of:
- The rope length deployed since the last anchor, and its elasticity
- The possible tearing of the energy absorber
- The engagement distance of the ASAP, which can be longer than for a fall in clear space (the ASAP is not immediately tensioned in a pendulum)
When suspended on the ASAP after a fall, the user or their teammate must install another system for evacuation.
Precautions:
- Always keep the ASAP's rope under tension, without any slack
When tying a knot, slack must be created. The ASAP must then considered to be deactivated: the user must have a backup system (lanyard on the anchor, for example)
- Always stay below the anchor points
- Whenever possible, use a backup system on a high point that reduces the pendulum risk
- The user must carry out a risk analysis before committing. It must specifically address the spacing of the anchor points and the pendulum risk, and assess the necessary clearance in case of a fall
1. Example of an installation technique when there is a low risk of falling:
Progression:
The blue rope is installed as a life-line, the rope moving through the ASAP allows slack to be avoided.
Tying a knot:
User in tension on the lanyard connected to an anchor. The user makes enough slack above the ASAP to tie the knot. The ASAP is ready for the next progression stage.
Advantages:
- User autonomy
Disadvantages:
- Limits progression to closely-spaced anchors and to situations with a low risk of falling
2. Example of installation technique with a teammate providing a backup belay at the anchor:
Progression:
The blue rope is installed as a life-line, the rope moving through the ASAP allows slack to be avoided. Backup belay on the gray rope with a belayer at the anchor.
Tying a knot:
The user is in tension on his lanyard and always backed up by the gray rope. The user makes enough slack above the ASAP to tie the knot. The ASAP is ready for the next progression stage.
Advantages:
- Speed and hands-free progression
- Pre-installed system for teammate assist
Disadvantages:
- Managing multiple ropes passing through the anchors
9.3. Pendulum fall tests
Tests carried out with a 100 kg mass, an ASAP'SORBER 40, ASAP installed on a new AXIS 11 mm rope, and a figure-8 knot at the anchor point.
Start of the fall: mass positioned 3 m from the anchor point, with 3 m of rope deployed (the length of the ASAP'SORBER + 2 connectors creates a slight loop of slack).
The same fall was repeated three times under identical conditions.
Principal results:
ASAP engagement distance: 21 to 32 cm.
Complete tearing of the ASAP'SORBER 40.
Rope intact, ASAP to be retired.
Mass stopped 4.30 m below the anchor point (add the height of the user and a safety margin to calculate the necessary clearance).
During the pendulum, the mass reached a point opposite the anchor, more than 3.50 m from it.
This test was repeated multiple times to be able to record average values, however the results obtained are given for information only.
With the ASAP'SORBER 40, 3 m seems to be the maximum acceptable distance between the anchors.
Consider this information, in the context of your environment, when doing your risk analysis.


