


How to inspect your climbing harness
When was the last time you inspected your climbing harness? Do you know how old it is and if it needs to be retired? As a climber, it is your responsibility to inspect your gear before or after each use to help reduce the inherent risks of climbing. If your harness is showing unexpected degradation, it should be quarantined until a detailed inspection can be done.
January 24 2018
Indoor and Outdoor Climbing
Petzl recommends having your gear inspected every 12 months by a competent person. Before hitting the gym or crag again, conduct a 14-point inspection on your harness to determine if it’s clear for use. You can download the official inspection procedure and inspection form on the product pages at petzl.com. When inspecting your harness, determine the condition of each element that you inspect.
Know the product history
Step 1: Know the conditions in which the harness has been used and identify any “exceptional events” during its lifespan (examples: falls, exposure to extreme temperatures, modification outside of manufacturer's facilities, etc).
Make preliminary observations
Step 2: Verify the presence and legibility of the serial number and the CE mark. Please note that the serial number on your climbing harness could be one of two styles. See below for details on each type of serial number.
Step 3: Verify that the maximum product lifetime--10 years--has not been exceeded.
Step 4: Compare with a new harness to verify there are no modifications or missing elements.
Check the condition of the straps
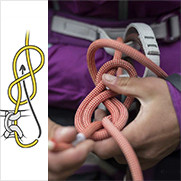
Step 5: Check the waist belt straps, bias tapes, leg loop straps, and shoulder straps (if there are any) for any cuts, swelling, damage, and wear from overuse, heat, or contact with chemicals. Be sure to check the areas hidden by the buckles.
Step 6: Check the condition of the safety stitching on both sides. Look for any threads that are loose, worn, or cut. The safety stitching is identified by thread of a different color than that of the webbing.
Check the tie-in points and belay loop
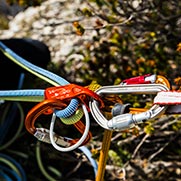
Step 7: Check the belay loop for any cuts, swelling, damage, and wear due to use, heat, or contact with chemicals.
Step 8: Check the condition of the protective webbing on the tie-in points for any cuts, swelling, damage, and wear due to use, heat, or contact with chemicals.
Check the condition of the adjustment buckles
Step 9: Check the condition of the adjustment buckles for any marks, cracks, wear, deformation, corrosion, etc.
Step 10: Check that the straps are correctly threaded, with no twists.
Step 11: Verify that the buckles operate properly. Refer to the Technical Notice to verify the correct function of the buckles.
Check the comfort parts
Step 12: Check the condition of the waist and leg foams for any cuts, wear, tears, etc.
Step 13: Check the condition of the elastic keepers and leg loop elastics for any cuts, wear, tears, etc.
Step 14: Check the condition of the equipment loops for any cuts, wear, tears, etc.
Conclusion
If any element of your harness is marked as “To monitor”, you should very regularly inspect the area of concern. If an element was marked as “Do not use, retire”, you should destroy it to prevent further use and purchase a new one.
Examples of harnesses that are worn out or should be retired
Related News