Knots
Basic Techniques
How to tie knots? Explanatory diagrams.
Warning
- Carefully read the Instructions for Use referenced in this Tech Tip before reading the Tech Tip itself. You must have read and understood the Instructions for Use to understand this supplementary information.
- Performing these techniques requires specific training. Work with a professional to confirm your ability to perform these techniques safely and independently before attempting them unsupervised.
- We provide examples of techniques related to your activity. Other techniques not described here may also exist.
Figure-eight knot
For tying in
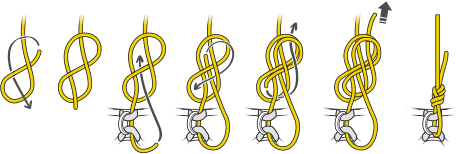
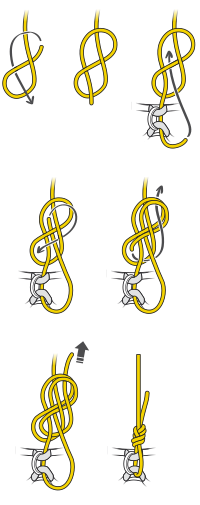
Figure-eight knot
For the anchor
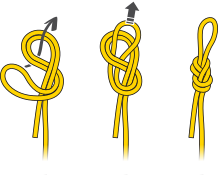
Flat overhand bend
For joining two ropes
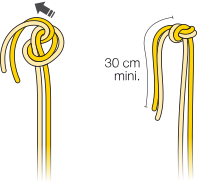
Bowline knot with backup knot
Easier to untie than the figure 8 knot
WARNING: backup knot mandatory (e.g. with a double overhand knot)
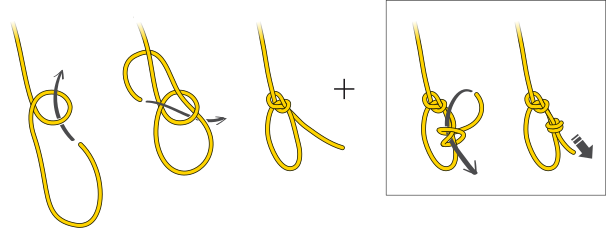
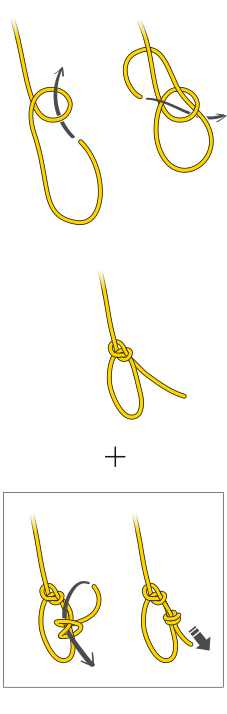
Clove hitch
Rapid-adjust anchor knot
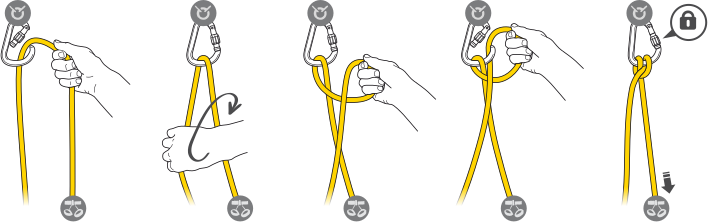
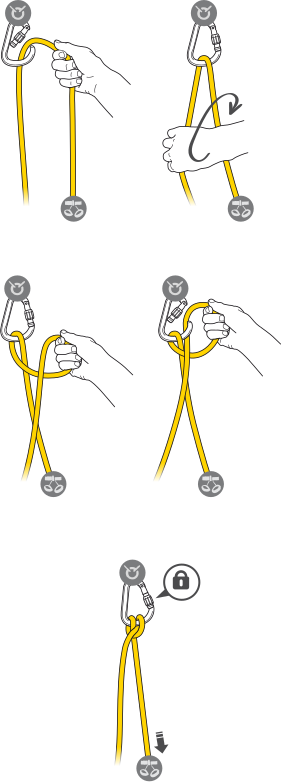
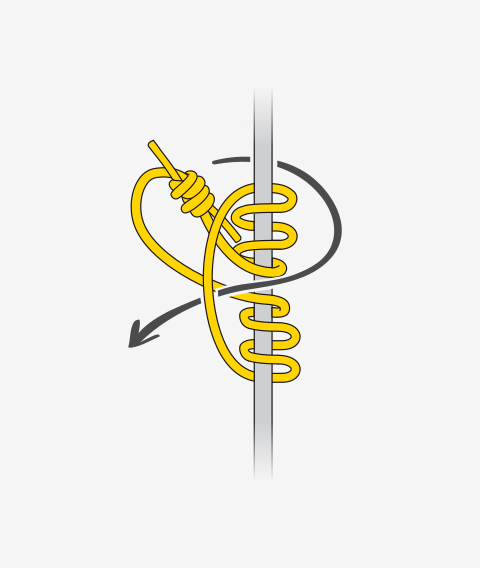
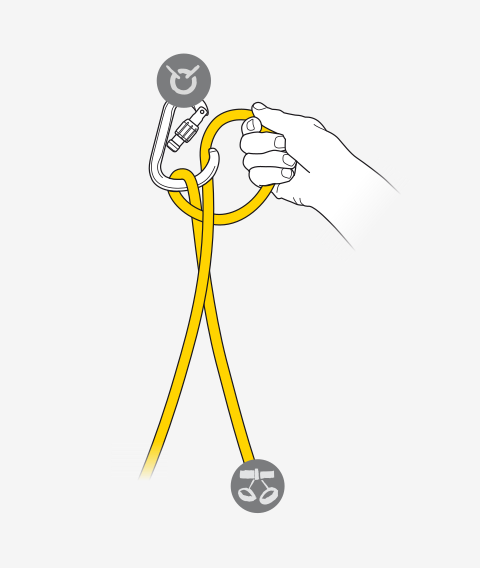
Munter hitch
Friction hitch, does not lock the rope
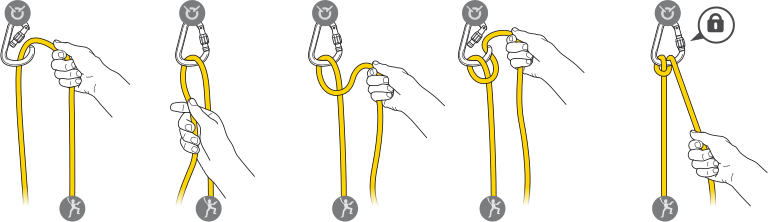
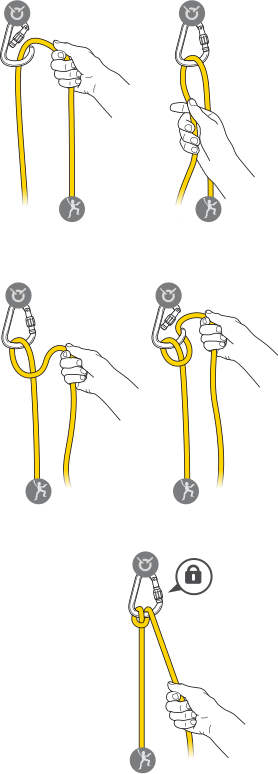
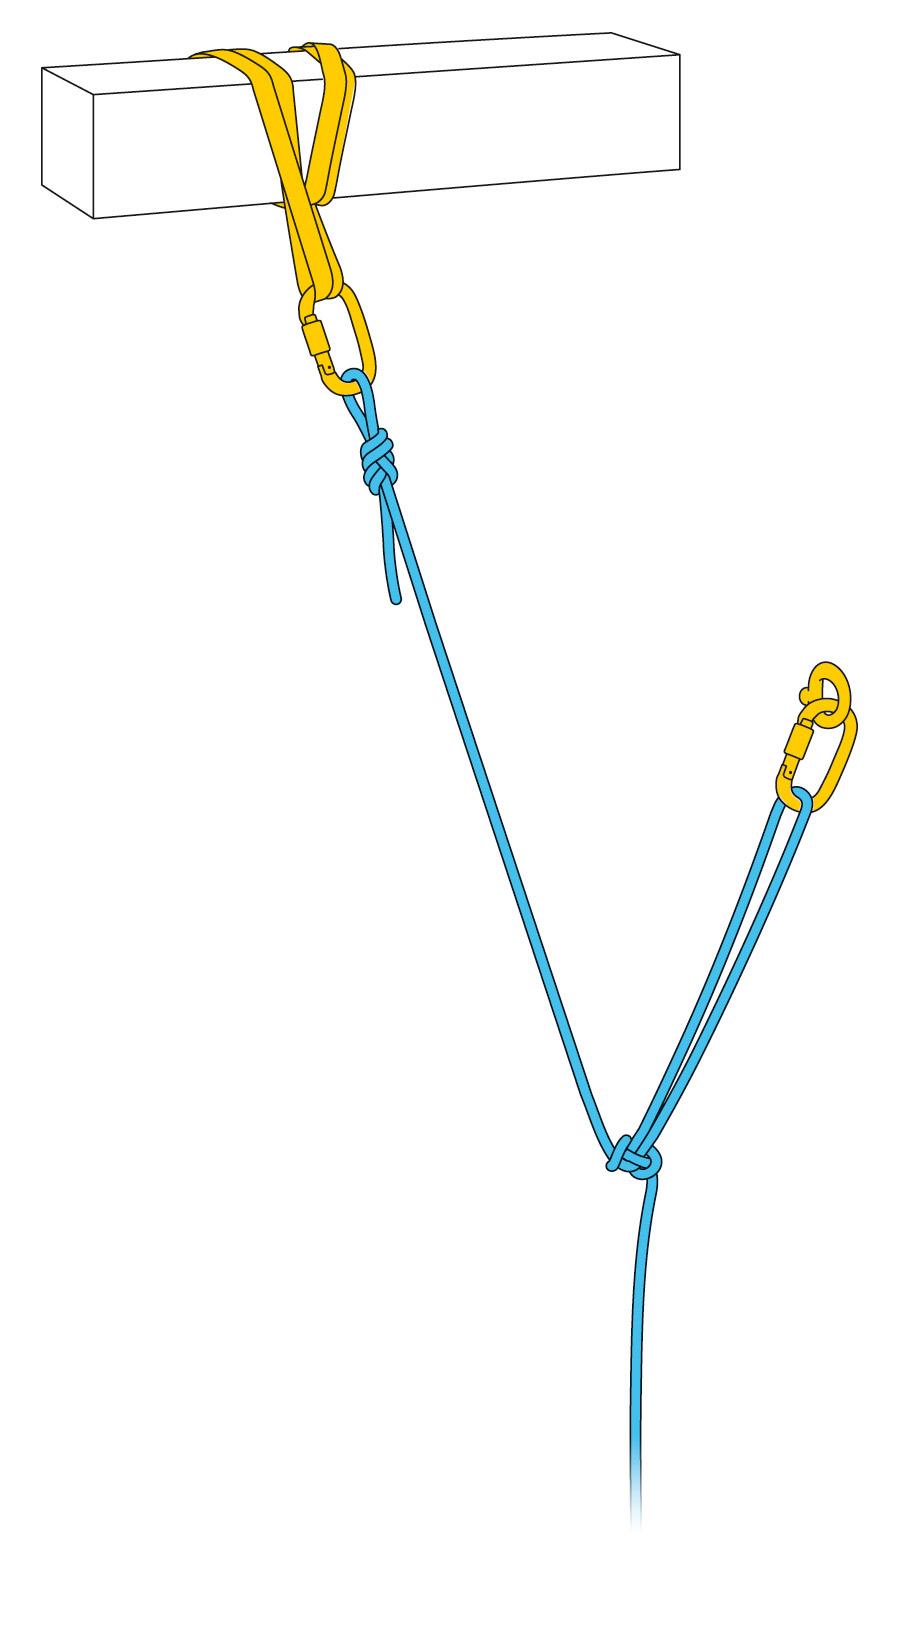
Double knots
Used to equalize anchors when installing a fixed vertical line or traverse line.
The bowline on a bight can be easier to undo after significant loading.
Bunny
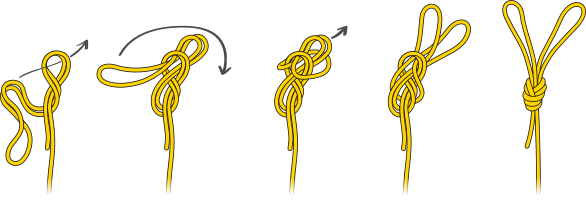
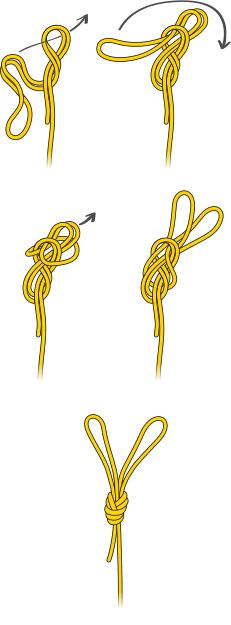
Bowline on a bight
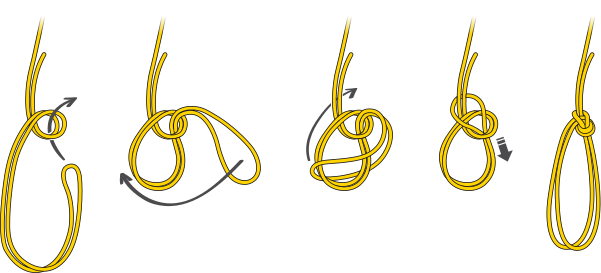
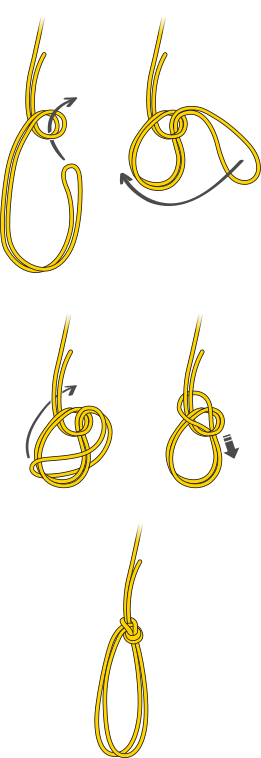
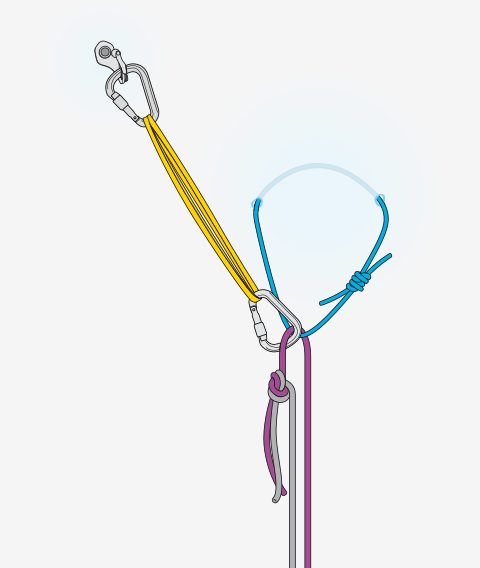
Butterfly knot
One of the few knots that minimizes rope strength loss, this knot may be used to isolate a damaged section of rope.
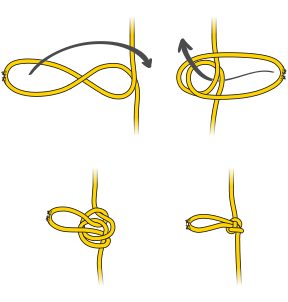
Butterfly knot
It can also be used to equalize two widely separated anchors in conjunction with a figure 8 knot.